FROM ICE TO ICECREAM
When water freezes you get ice. You can eat solid ice, but it isn’t much fun and it breaks your teeth. There is a much better way to get the enjoyment of something cold in your mouth.

Icy poles or ice confections
Icy poles are frozen, but they are not hard like ice, so how is it that we are we are able to eat them? They are made of a sugar syrup (about 16-20% sugar) plus colour and flavour. When the icy pole mix is refrigerated bits of water freeze as pure ice crystals. The ice is still solid – but in thousands of tiny ice shards. Ice crystals will continue to form until about 72% of the icy pole is an ice crystal structure and the remaining 28% is a very concentrated sugar solution.
The sugar component doesn’t freeze so the syrup becomes more concentrated and the taste can be quite strong. You can see this when you suck an icy pole really hard – you get a big flavour hit and it leaves behind a bleached white, less than solid, ice structure.
Snow cones work on similar principals, but instead of allowing the small crystals to form we make them out of a solid ice block. Solid ice is shaved to make it easier to eat and then topped with super concentrated topping.
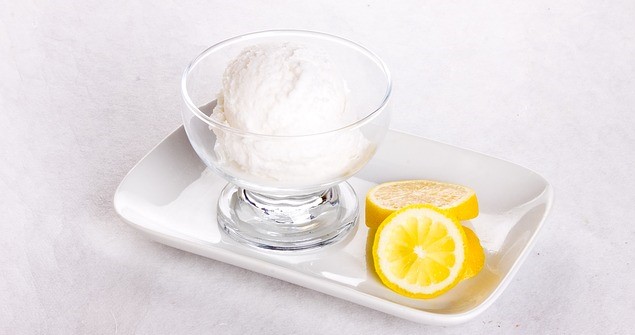
Sorbet
Sorbet is still frozen like an icy pole but has a softer texture. This is achieved by two doing things. Firstly, sorbet is smashed about while it is freezing so that the individual ice crystals are smaller. This incorporates some air into the sorbet which also makes it lighter in colour.
Secondly, sorbet has a slightly creamy texture. It doesn’t have fat or cream, although some ingredients may contain tiny amount of fat, so this ‘mouth feel’ is achieved from ingredients such as egg white (traditionally), fruit pulp or vegetable gums.
But the most unique feature of sorbet is the tang. Traditionally lemon juice is used to give it a sharp, cleansing edge, but any acid, such as citric acid, will have the same effect on the flavour.
Ice-cream
Traditionally ice cream is made from cream and/or milk, sugar and vanilla, and by law must have 10% milk fat by weight – so anything dairy-free or allergy-aware is really a ‘frozen dessert’ not icecream.
From a food science point of view ice-cream is both an emulsion and a foam. Once established the ‘oil in water’ emulsion must be prevented from separating (you know that awful thing that happens when ice-cream melts and refreezes and you get yellow watery ice at the bottom).
Good icecream is light and fluffy. By whipping the mix as it is freezing, air is incorporated into the ice-cream. You will notice that ice-cream is sold by the volume – not the weight, which means the more you whip it the more money you make. The good news is that even the cheap brands can’t make it too fluffy, because by law it must contain less than 50% air.
Traditional homemade vanilla icecream calls for about 3 cups of thin cream, low fat cream, half and half, or full fat milk – depending on how big your waist already is.
You add 3/4c of castor sugar and about 1 tsp vanilla extract. Stir until dissolved. It will taste strong but don’t worry the coldness of the finished icecream blunts the taste. This mixture is now ready for the icecream machine or the stick blender.
Chocolate Icecream is pretty much the same except that you need to gently melt about 180g of chocolate into the cream before you start.
ICECREAM MACHINES
Ice concoctions are reported as begin made as long ago as the 4th Century BC. Since then methods and flavours have been refined. The traditional way to make sorbet or icecream is to place the liquid in a container and periodically get it out of the freezer (or frozen lake, or the snow!!) and churn it. I have found that three jolly good churns over 3 hours does the trick. You can use paddles, egg beaters, whisks – but I love my $10 stick blender and that really makes the job easy.
Domestic icecream machines work on the same principal. The bowl is pre-frozen for 14 hours or so. The liquid goes into the bowl and while it is churning (about 15 minutes) the subzero temperature is transferred to the icecream. Scoop the icecream into a nice container to harder up in the freezers and presto!!
MAKING ALLERGY-AWARE ICECREAM
You can make dairy-free icecream with one part coconut cream and three parts of either soy milk, rice milk, almond milk or oat milk (or a combination of these). The trick is getting the liquid fatty enough. (PS Ayam Brand Coconut Cream is the ONLY one I have every found that is 100% coconut all the other have water and thickener and other junk).
And now to make icecream out of nothing
Place 2 ¼ cups water and ½ cup (100g) of sugar in saucepan. Bring to boil and continue for 15 mins to make syrup.
Leave it to cool slightly. In a 1 litre plastic jug blend 60mls of any vegetable oil (pick one with very little taste like Rice Bran Oil) and ½ teaspoon of Xanthan Gum with a fork.
Pour the still warm syrup over the oil and mix with a fork until it kind of blends. Refrigerate for 4 hours, it will thicken quite a bit and look like runny anaemic glue. THAT’S PERFECT.
Whip it with a stick-blender for 3-5 minutes until it goes white. Then put it in the freezer. Remove from freezer every hour and re-blend until it has frozen solid.
ICECREAM WITH BITS
Kids love bits in their icecream – actually lots of people do – and the method is really simple. If you add the bits when the icecream is being made they will sink to the bottom so you need to make (or buy) the icecream first. Take it out of the freezer until it starts to soften. Stir in ‘bits’. Put back in freezer.
So what bits can you add? Well just about anything sweet than can be made into small pieces.
Broken biscuits, choc chips, sultanas, other firm chopped fruit, small jelly sweets, (avoid big ones like jelly beans and they turn into granite), nuts if you can have them! broken honeycomb, concentrated fruit topping, yoghurt, licorice allsorts, or caramel.
For a quick caramel recipe – put 1c sugar in a pan, add a dash of vinegar or lemon juice and just enough water (about 1/4c) so that once heated all the sugar dissolves. Boil until a blob dropped into cold water sets hard straight away. Pour onto a greased pan. Leave to set. Then smash with hammer. Now it is ready to fold in.
Discover more from Miss Jane Suggests
Subscribe to get the latest posts sent to your email.
